
Step 1: Install NetsPresso Training Studio
Download linkPlease note that while the Training Studio can be installed on various systems, the training process must be run on a GPU server compatible with Linux.
You can download desktop application from the link below:
Install the Training Studio to enhance your training and optimization process more efficiently.
Software Requirements
OS
The supported operating systems are listed below. Please ensure you install the NetsPresso Docker image on your GPU server first to build a model.
| OS | Training Resource | Desktop Application |
|---|---|---|
| Linux | ✅ | ❌ |
| Mac OS | ❌ | ✅ |
| Windows | ❌ | ✅ |
macOS Installation Guide: How to Open NetsPresso Training Studio
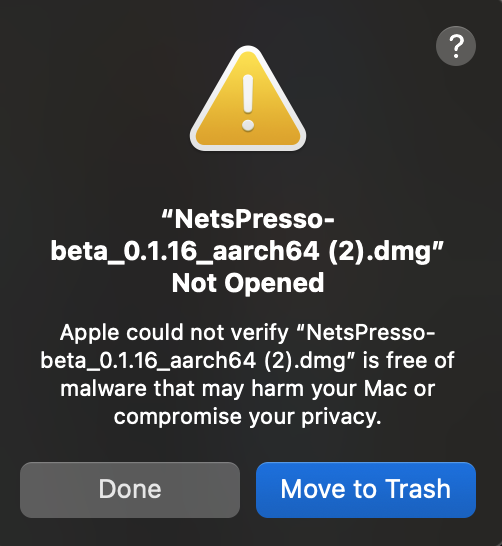
When installing NetsPresso Training Studio (GUI) on macOS, you may see a security warning because the app is not notarized by Apple. Follow the steps below to allow the app to run.
How to Allow the App to Open
- Initial Warning When Opening the Installer
- After downloading and launching the
.dmgfile, you may see a warning like screencapture - Click "OK" or "Done" to close the message.
-
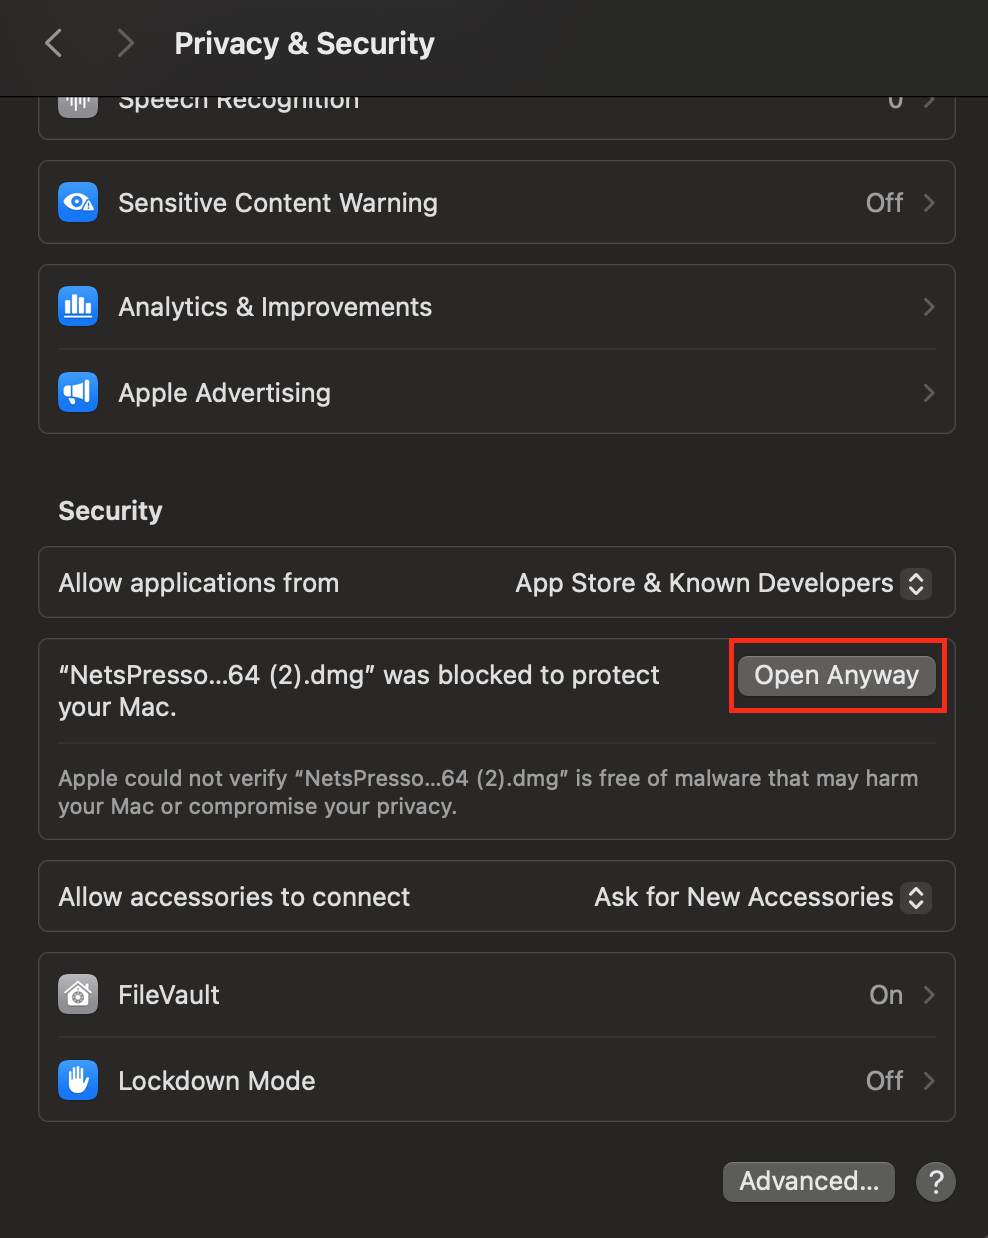
- After downloading and launching the
- Open System Settings > Privacy & Security
- Go to System Settings > Privacy & Security
- Scroll down to the Security section
- You will see a message saying the app was blocked
- Click [Open Anyway]
-
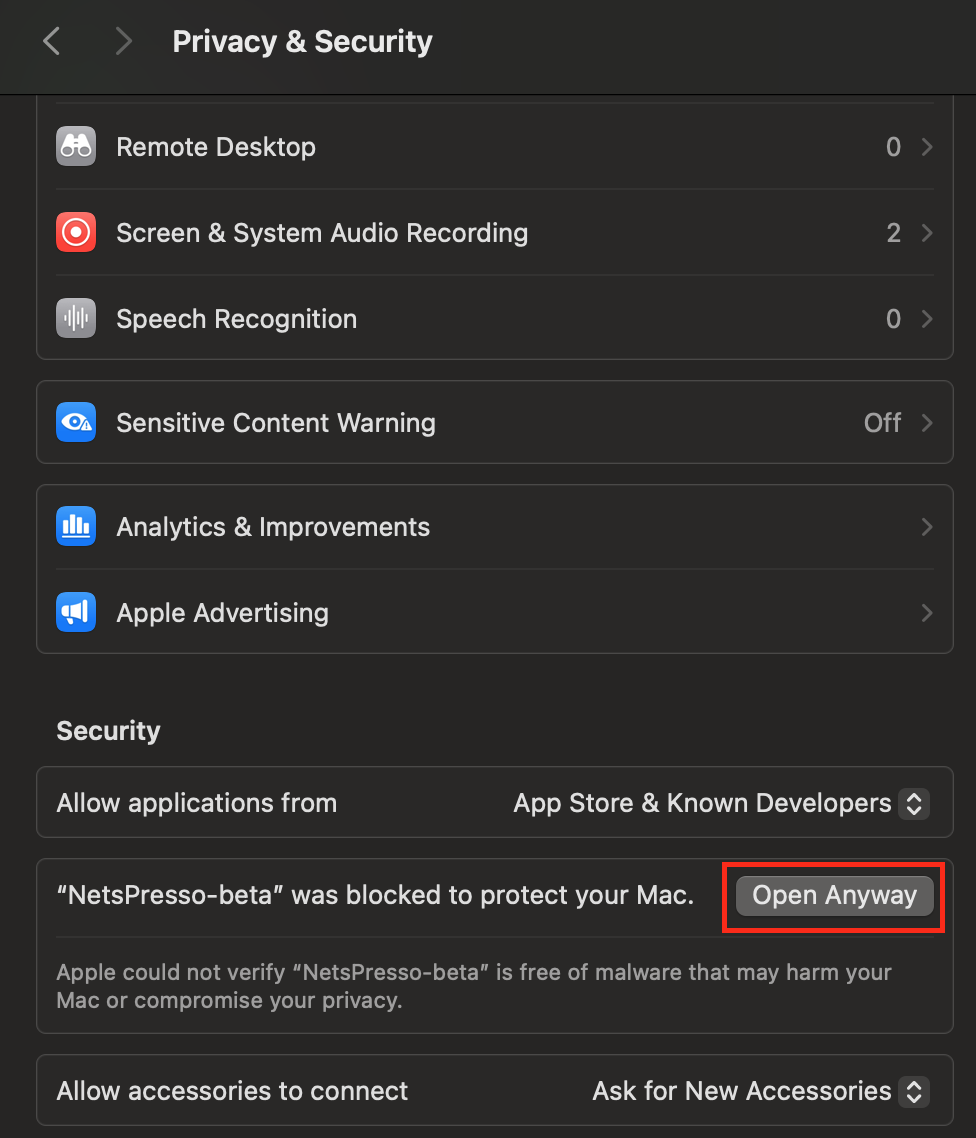
- Relaunch the App
- Go back to the
.dmgwindow and click on the app icon again.
- Go back to the
- Confirm the Final Warning
- You will see another message like:
-
Training Studio Installation
Install Docker Application
You need to install Docker first.
Install Docker Image (CPU Mac only)
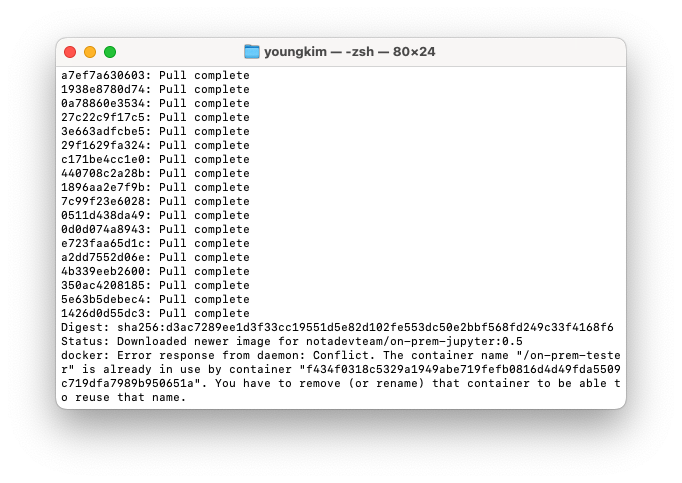
docker run -it -d --ipc=host --name on-prem-tester -p 7999:7998 notadevteam/on-prem-jupyter:0.9Install Docker Image (Linux)
docker run -it -d --ipc=host --gpus all --name on-prem-tester -p 7999:7998 notadevteam/on-prem-jupyter:0.9Once the pull is complete, it means the Jupyter Server has been successfully installed on your computer. You can then launch Training Studio client to connect to the server.
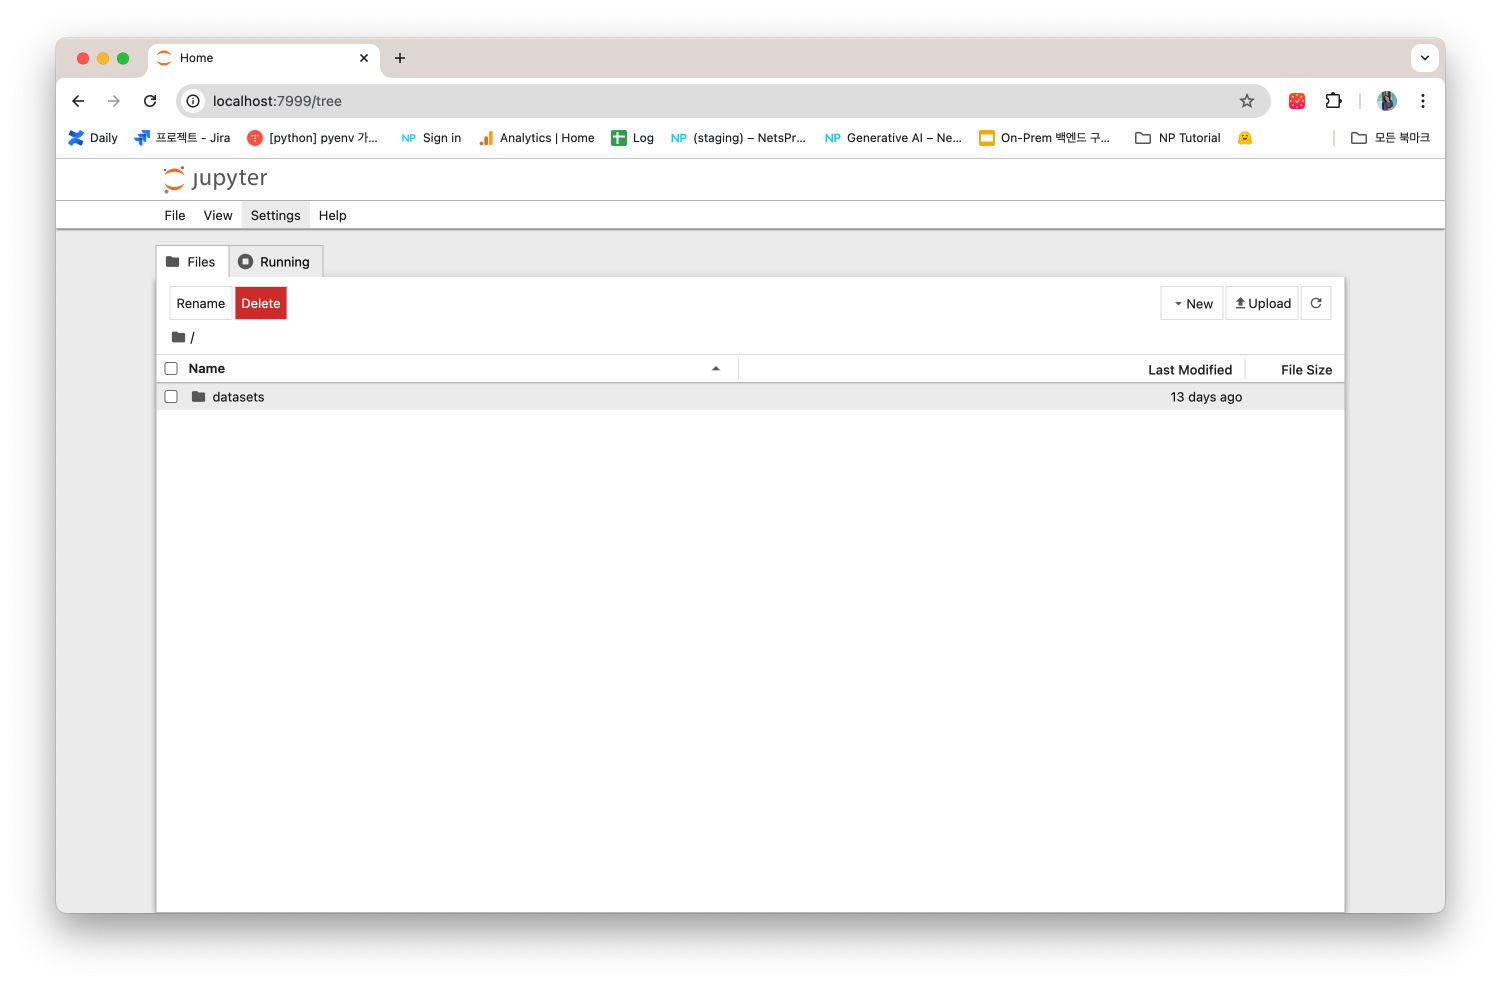
You should see that a project folder has been created in the specified directory at 'http://localhost:7999' or compatible server IP. The sample dataset folder is pre-installed for easy model training.
The list of sample datasets are as follows:
- Image Classification - Cifar100 (link)
- Object Detection - Traffic Sign
- Semantic Segmentation - VOC2012
Install Training Studio application
NetsPresso Account
You need to create a NetsPresso account. Please use the click link to create your account (link).

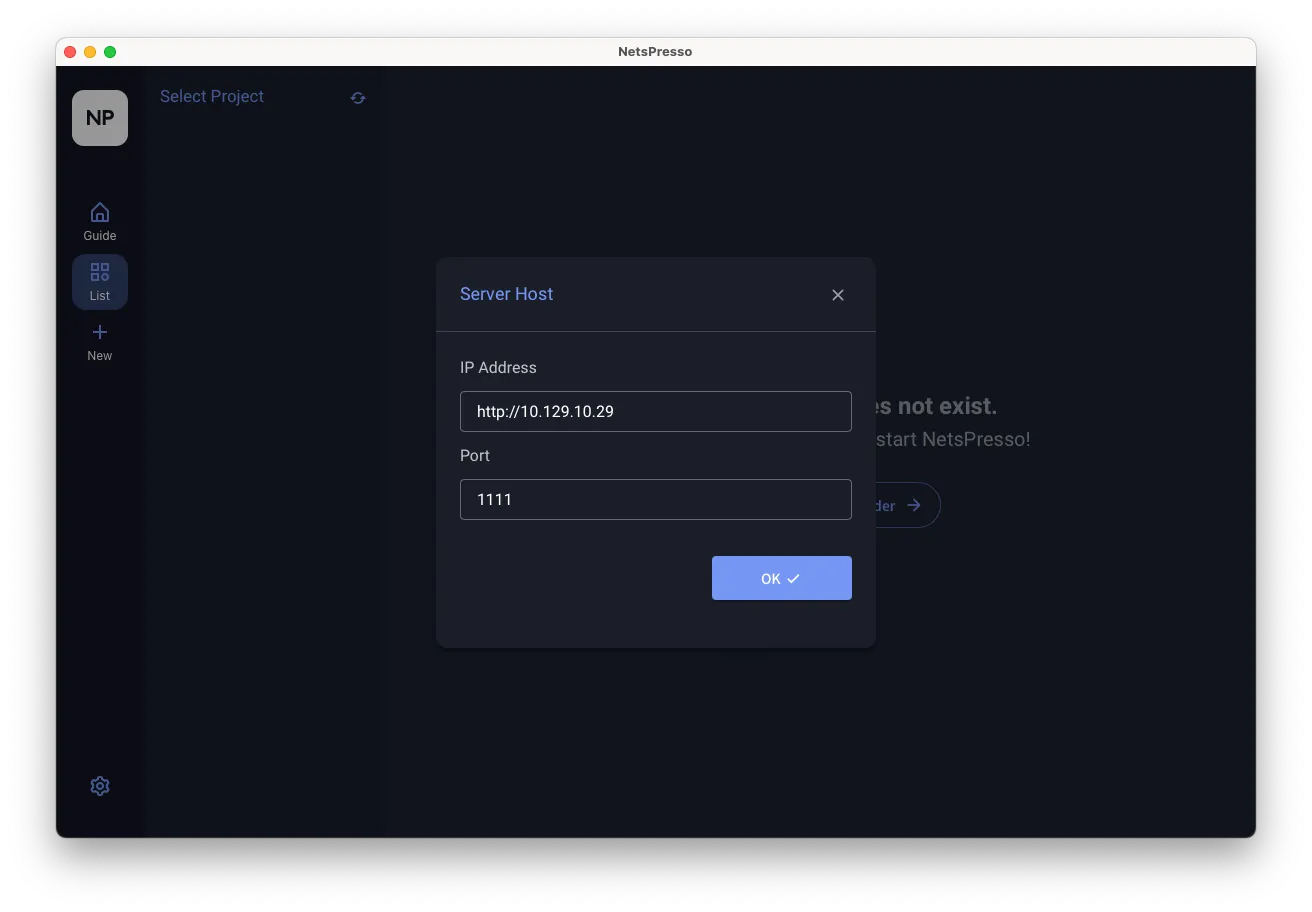
Server Setting
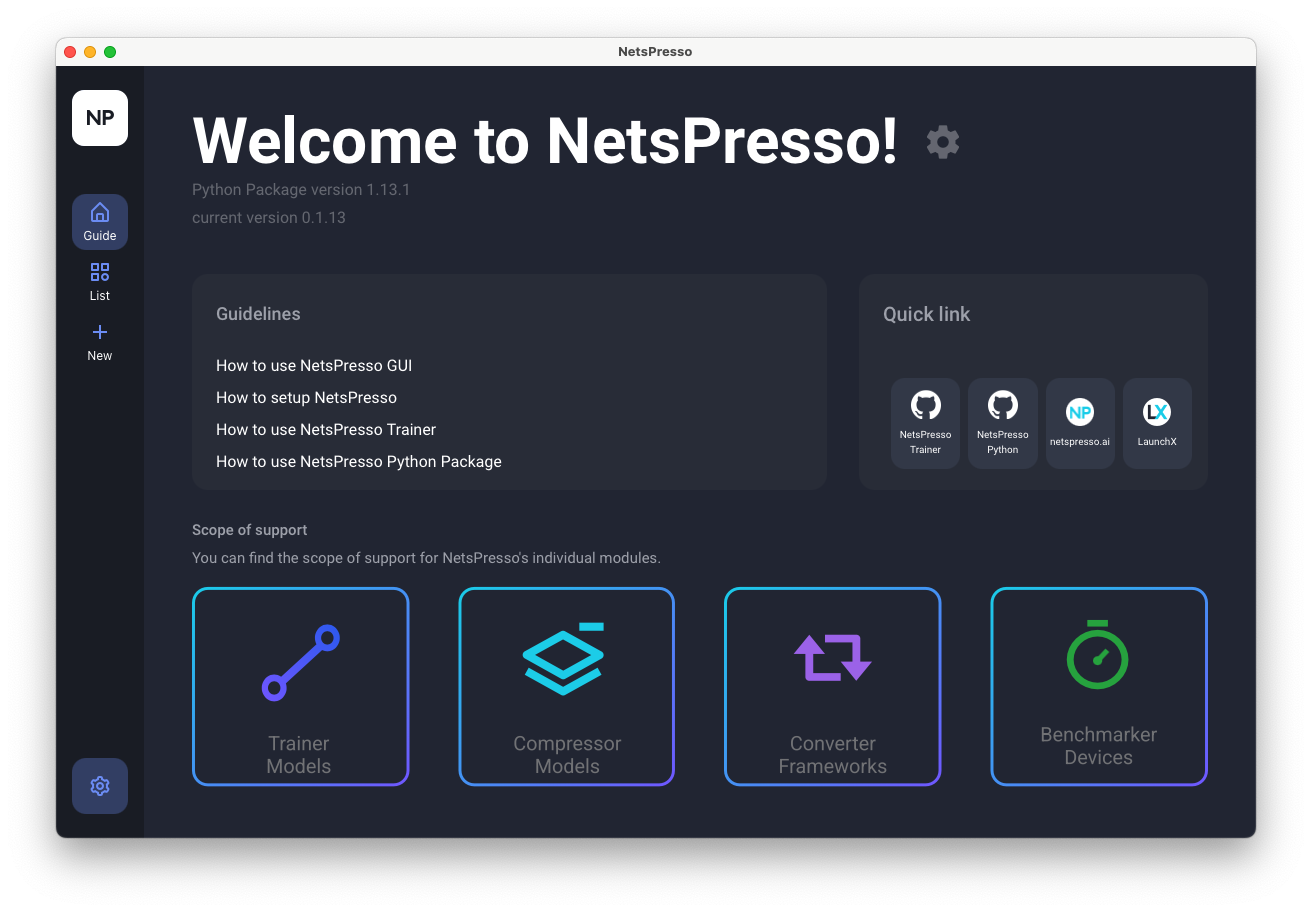
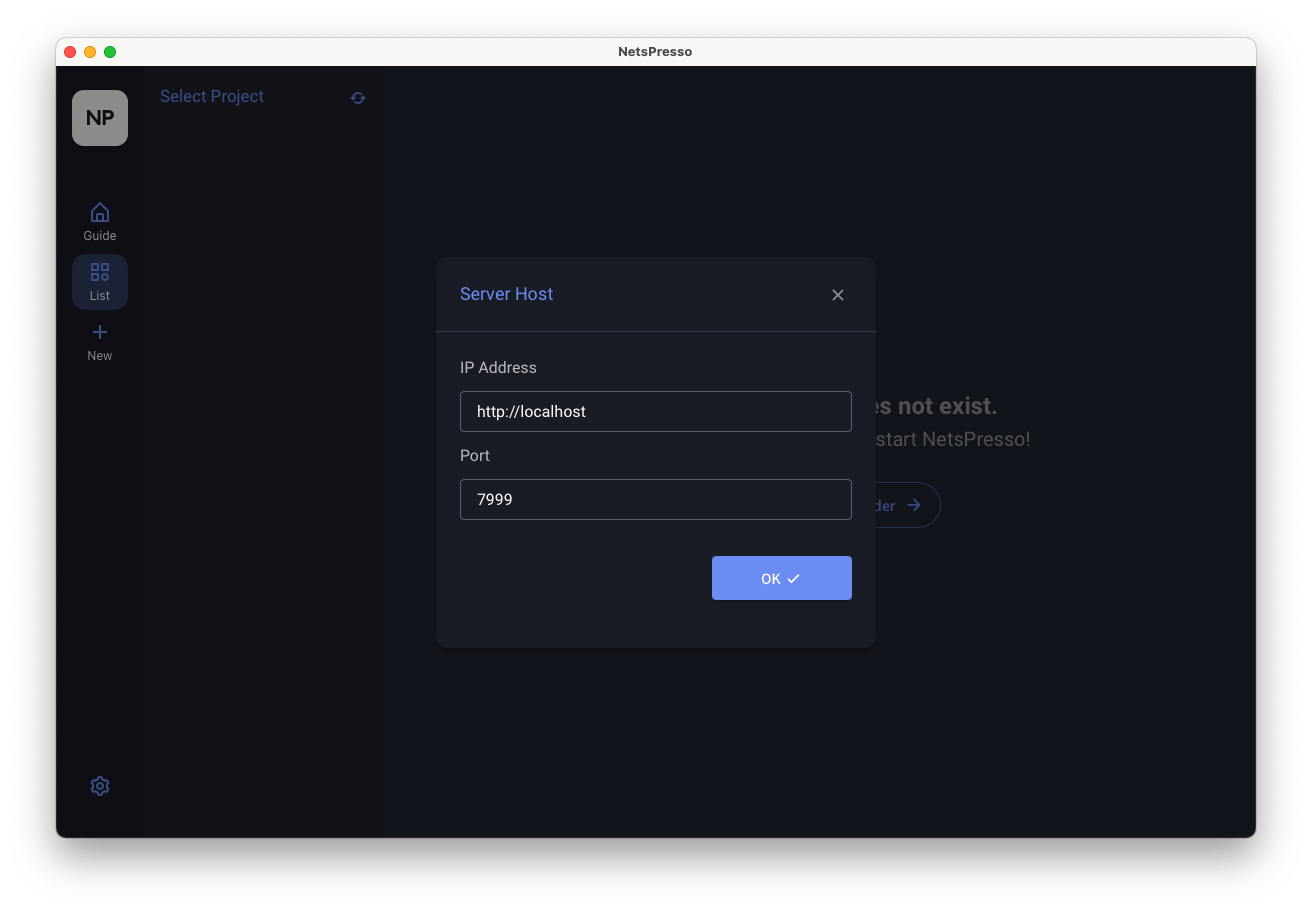
Once you have successfully installed and signed in to the Training Studio, set your server host to train your model.
Updated 8 months ago